Saturday 5 December 2015

Moroccan Spice Mix (Edible Christmas Gifts)


Edible Xmas gifts are a passion of mine, because most people I know don't need more stuff and home made consumables are such a nice thing to give. I've tended to try and go on the healthy side the last few years, making Tomato Vodka Pasta Sauce Gift Packs, Cornbread in a Jar (2 kinds) and Bean Soup in a Jar. Also in keeping with the less-sugary-treats theme (but so much 'healthy') I've also made lots of infused vodkas - chilli, raspberry and strawberry lime.

I've been blogging for years now, and still trying to come up with new and different ideas to share for home made Xmas pressies. This year* I've gone with a theme of home made spice blends, giving away my own home made Garam Masala and also this beautiful Moroccan Spice blend. I like to try and give some guidance with my gifts though, so I've written a basic recipe on the label to help my recipients use it up.


* actually, I'll let you in on something. I hate to spoil the surprises for my family and friends by blogging about their Xmas presents before they even get them, so each year I blog about last years home made Xmas gifts. These spice blends were part of my gifts last year :)


I've started by toasting some of my spices, because I just love to do it. You can simplify the whole process and just mix pre-ground spices if you prefer. Get some little jars with good sealing lids, so the spice blend keeps nice and fresh for as long as possible. If you want to add the the gift you could combine it with some good quality couscous, a jar of Preserved Lemons or even a tagine. 

Moroccan Spice Mix

Ingredients
3 cinnamon sticks (you can substitute 1/4 cup ground cinnamon)
1/4 cup black peppercorns (you can substitute ground black pepper)
1-2 dried chillis (more or less to taste, you can substitute 1/4 cup cayenne pepper)
1/2 cup cumin seeds (you can substitute ground cumin)
1/2 cup ground ginger
1/4 cup smoked paprika
1/4 cup turmeric

To make: 
1. Combine the cinnamon sticks, peppercorns, dried chillis and cumin seeds in a dry frypan and toast until fragrant. Crush in a spice grinder/coffee grinder/food processor/mortar and pestle into a fine powder. 
2. Add in the ground ginger, smoked paprika and turmeric. 
3. Divide into small jars with tight sealing lids. 
Makes about 2 1/2 cups spice mix, will keep for several months. 

Write a label with a basic recipe if you like, here is what mine said:


Tuesday 1 December 2015

Yule Mule (Cocktail)


Ever since I made this delicious Dutch Orange Bitters, I've been keeping an eye out for cocktails to use it in. This Yule Mule is (as you can tell by the name) a traditional Yuletime cocktail, but really is great any time of the year. It's incredibly refreshing on a hot Australian summer day, so bring it out at your family Xmas this year. You could even give gifts of little bottles of home made Orange Bitters to family with a copy of the recipe for this cocktail so they can replicate it at home.


How are you going for Xmas gift ideas? If you're a bit stumped, or are looking to add in some home made edible stocking fillers then Gormandize has definitely got you covered! Small edible gifts are also great for colleagues, teachers or neighbours who you want to give a gift to but don't know that well and don't want to spend too much on. All this month starting tomorrow, I'll be sharing Christmas Gift ideas on the Gormandize facebook page. Don't worry, they're not all just different types of biscuits in jars - they're very varied. Follow the page on facebook to get all these nifty ideas in one place. 


Yule Mule

Ingredients
1 1/2 measures of vodka
1/2 measure fresh lime juice
1/2 measure cranberry juice
Dash of orange bitters 
3 measures ginger beer

To Make
1. Combine vodka, lime juice, cranberry juice and orange bitter. Shake well and strain into a highball glass half filled with ice.
2. Top up with ginger beer and serve. 

Makes 1 drink - multiply by however many people you're making it for.


Friday 27 November 2015

Vegan Treacle Tart


The most fun thing about featuring recipes from the UK was certainly getting to try all the classic desserts. I've never had a treacle tart before, so was glad to get the opportunity to make one. Actually, it was very easy because the traditional treacle tart recipe is generally already vegan. I wasn't sure if it was going to be sickly sweet, but it actually wasn't that sweet at all. I was really pleasantly surprised. Even though it's full of sticky sweet golden syrup, it's offset by the fact that the pastry isn't sweetened at all and there is lots of lovely fresh lemon juice to cut through the sickliness. The amount of lemon juice you use is really 'to taste' - some people like less lemon juice so the tart is sweeter, some like more juice so it's more sour. This recipe uses quite a lot of lemon juice, but you can add less if you like less tang and more sweetness.

Treacle Tart

Ingredients
250g plain flour (I prefer wholemeal, but you can use either)
125g vegan margarine 
3 tbsp iced water
400g golden syrup
150g fresh breadcrumbs
Zest and juice of 2 lemons

To Make
1. Put the flour in a food processor and cut in the margarine. Pulse it until the mixture resembles fine breadcrumbs. You can also do this without a food processor - just put the flour in a bowl and rub the margarine through with your fingertips. Gradually add in the iced water until the mixture clumps together. Test the consistency, it should be a firm dough, but not sticky when you touch it. If it's too crumbly to form a ball, add a little more water, if it's too sticky add a little more flour. 
2. Wrap the pastry in plastic wrap and refrigerate for at least 20 minutes (you can also make the pastry the night before). In the meantime, grease your flan tin (one with a removable bottom is really easiest) well. 
3. Preheat the oven to 200 degrees C and put a baking tray in the oven to heat up.
4. Set aside about 150g of the pastry to make the lattice. Roll out the rest of the pastry into a large thin disc and line the greased flan tin. Prick the base with a fork to prevent bubbles while cooking. 
5. To make the filling, heat the golden syrup in a saucepan until runny. Add the breadcrumbs, lemon juice and lemon zest and remove from the heat. The filling should be fairly thick, if it's too runny - add more breadcrumbs. Pour into the pastry base.
6. Roll out the reserved pastry and cut into thin strips to make the lattice top. Once the lattice is complete, trim off any overhanging edges by pressing them down on the side of the metal tin. 
7. Place in the oven on the preheated baking tray and bake for about 10 minutes and then reduce the heat to 180 degrees C and cook for a further 25 minutes, until the pastry is golden brown. Let sit for at least 10 minutes before serving, to firm up and to allow the filling to cool a bit. 

Serve warm or cold, with a dollop of whipped coconut cream if you like. 


Tuesday 27 October 2015

Mushroom & Guinness Pie


I'm currently making and sharing lots of recipes inspired by the United Kingdom. As spring here has had plenty of chilly days and nights, the stodgy comfort food has been quite nice. I felt it was important to include an Irish inspired dish loaded with Guinness - so here it is. Unfortunately, Guinness itself is not actually vegan, so if you're making this dish and you're a vegan or a vegetarian you can just swap out the Guinness for a vegan/vegetarian friendly stout (such as Coopers).

I never do things by halves, so I've used almost a whole can of Guinness in my pie. This makes for a lovely strong Guinness flavour, which may not be for everyone. If you like it a bit milder, just substitute one of the cups of Guinness for some more beef stock (I've used Massel beef stock, which has no animal content).


Mushroom & Guinness Pie

Ingredients
2 onions, finely chopped
4 gloves garlic, minced or crushed
2 tbsp butter or margarine (vegan friendly)
500g large field (portobello) mushrooms, washed and cut into medium chunks
3/4 cup wholemeal flour
2 cups Guinness (or stout beer)
1/2 cup strong hot 'beef' stock (no animal content brand)
1 tbsp soy sauce
cracked pepper to taste
2 sheets puff pastry, thawed
Sesame seeds, to sprinkle

To Make
1. Preheat the oven to 180 degrees C. 
2. Melt the butter in a frypan and cook the onions and garlic until translucent. Add the chopped  mushrooms and 1/2 cup Guinness and simmer until the mushrooms are cooked.
3. Add the flour and stir vigorously. Next, gradually add in the remaining Guinness and the beef stock, stirring continuously to make a gravy. Adding gradually and stirring lots should prevent it forming lumps and keep it nice and smooth. If it's looking a bit too dry, you can add a touch more stock or beer to slacken in a bit (this can vary, depending on how juicy your mushrooms were in the beginning). 
4. Season with soy sauce and plenty of cracked pepper.
5. Grease a pie dish and line the bottom with one of the sheets of puff pastry. Pour the filling in and top with the remaining sheet of pastry and crimp the edges firmly together using your fingers, or a fork. If you want to use cutouts, like I did, cut them out of the pastry before you put it on the pie. If not, just use a knife to make a few slits in the top to let the steam out while it cooks. Sprinkle with sesame seeds.
6. Set your oven to the 'bottom only' setting and bake for 20 minutes (ensuring that the bottom is properly cooked) and then switch to the normal baking setting (top and bottom) and bake for another 10 minutes. It should be golden brown on top. 


Makes 1 pie, serves 4-6.


Friday 23 October 2015

Summer Pudding


I wish I had managed to get some better picture of this dessert - it's such a special one! Luckily it's also absurdly easy and actually fairly healthy, so I have no excuse not to make it again to try and get some better shots :)

When I first read about this very simple English dessert, I thought it sounded way too simple to actually work. I toyed with whether I needed to make changes when I made it to make it stay together (I was really worried the whole thing would fall apart when I cut it!), but this very simple method was so prevalent all over the internet that I figured it must work. I sceptically made it in the traditional way and was slightly amazed at how well it worked. It stays together beautifully when you cut it up into slices!

It made for such a refreshing and healthy dessert that I ate the leftover with vanilla yoghurt for breakfast the next few days.

I was a bit unsure about using white bread, because I really don't like white bread in general. I've used it, because I followed the traditional recipe faithfully. It was nicer than I expected, although I wonder if it might also work with other types of breads?


Summer Pudding

Ingredients
1 kg mixed berries, fresh or frozen
3 tbsp water
1/2 cup sugar
Fresh white bread with the crusts removed

Method
1. Set aside a handful or so of the berries for garnish and place the rest in a saucepan with the water and sugar. Cook for about 8 minutes or so, until the berries are no longer frozen and the juices run (you may need a bit less time if you are using fresh berries).
2. While the berries are on the stove, line a small pudding bowl with the trimmed bread slices. Press the edges together well, plug any little holes and make sure there are no gaps. 
3. Reserve 1/4 cup of the berry juice and pour the berries and remaining juice into the pudding bowl lined with bread. Cover the top with more sliced bread and press down gently.
4. Cover the pudding with a clean saucer that fits just inside the pudding bowl (if you've got one!) and put a weight on top (like a can or something similar).
5. Refrigerate the pudding overnight, or for at least 5 hours. 
6. To serve, remove from fridge and take off the saucer. Place a serving plate over the bowl and invert the pudding onto the plate. Use the reserved juice to cover up any white spots on the bread. Decorate with the reserved berries and drizzle any remaining juice over the top. 

Serve as is, or with whipped coconut cream or vanilla yoghurt. 

Serves 8-10 people. 


Friday 2 October 2015

Vegan Cauliflower Cheese


Cauliflower cheese is a bit of a household classic in any Australian home and, I imagine, any other country with a strongly British-influenced cuisine! This next month or two I'm going to be featuring dished from the United Kingdom, and I thought cauliflower cheese was a great way to start. It might sound like a bit of a contradiction to make vegan cauliflower cheese, but really, the key to cauliflower cheese is white sauce rather than cheese itself. If you're not a vegan, feel free to top with some grated cheese for an actual 'cheese' experience. To be honest though, this recipe tastes exactly like the cauliflower cheese that I used to eat as a child so I don't actually think the cheese is necessary.

For a good vegan white sauce, I prefer not to use soy milk because it has such a strong flavour which can dominate the mild creamy sauce. Any mild flavoured milk substitute should be fine, I prefer oat milk but almond milk would work well too.


Vegan Cauliflower Cheese

Ingredients
1 cauliflower, cut into florets
1/2 cup nuttelex (or other vegan margarine/butter)
2 onions, finely diced
3 garlic cloves, minced
3/4 cup plain flour
1/2 cup vegetable stock (hot)
2 1/2 cups unsweetened oat milk (or rice/almond milk)
1 tbsp lemon juice
2 tbsp nutritional yeast
Salt and pepper, to taste
3/4 cup breadcrumbs mixed with 1 tbsp nutritional yeast

To Make
1. Parboil the cauliflower until only just tender and then drain and transfer to a large baking dish. Preheat the oven to 180 degrees C.
2. Melt the margarine in a medium saucepan and then add the onions and garlic. Cook until softened and translucent.
3. Add the flour and stir vigorously to make a roux. Gradually add the hot vegetable stock, stirring as vigorously as you do to keep the roux smooth. Once all the vegetable stock has been added, start adding the oat milk, also gradually and while stirring.
4. Once all the milk has been added, stir the roux over a low heat and add the lemon juice and the nutritional yeast. Season to taste with salt and pepper (you probably wont need to add salt, as vegetable stock is usually already very salty). 
5. Pour the white sauce over the top of the sliced caulifower and smooth over evenly. Top with bread crumbs and cover with foil. Bake for 20 minutes and then remove the foil and bake for just long enough for the breadcrumbs on top to get lightly browned and crispy (you can switch your oven to the grill setting for this, in which case it will only take a few minutes). 

Serve as a side dish or as a main accompanied by some steamed green veggies.


Friday 11 September 2015

Berry & Rosehip Iced Tea


Spring is here now and the warmer weather seems tantalisingly close. Yet not quite in reach. It's lovely and warm in the sun and the temperatures are not too bad, but as soon as the sun disappears behind a cloud the chill sets in and you're reaching for a jumper. Evenings are still cold enough for heaters and blankets (in our cold house especially) but in the day I can cling optimistically to the promise of warmer things to come. It's about this time of year that I find myself optimistically digging out a t-shirt to wear and starting to think about summer foods. I can't wait for mangoes and stone fruits to become cheap & plentiful, but until then I can celebrate with summer style drinks, sitting out in the sunshine on my back deck.

This iced tea is caffeine free and unsweetened, so it's great if you want to enjoy a refreshing drink on a hot day without the caffeine and sugar. The berry teabags give it the sweet tang of berries without the sickliness of canned berries or berry juices. This recipe uses freshly squeezed orange juice, but feel free to get creative and add any juice you like. And if you have a bit of of a sweet tooth, some elderflower or ginger cordial can certainly be added. It can also be lovely with a small splash of orange blossom water or rosewater.

If you're celebrating or entertaining, add a bottle of champagne and thank me later :)


Berry & Rosehip Iced Tea

Ingredients:
3 berry tea bags (any kind you like, I used a 'forest fruits' one, but any mixed berry type thing is great)

2 rosehip tea bags
2 litres of boiling hot water
1 litre of freshly squeezed orange juice
Juice of 1 fresh lime. 

Optional garnishes - fresh berries, mint leaves, orange or lime slices. 


To Make:
1. In a large jug, add water and tea bags. Allow to cool to room temperature and then fish out the teabags Place in the fridge to chill. 

2. Remove from fridge and add orange juice and lime juice. Stir.
3. You can chill it again if you like, or just serve it straight away (with or without ice, as you prefer). 
4. You can add fresh berries, if you like and if they are in season, or even fresh mint leaves to garnish. 

Makes 12 cups (3 litres).


Friday 28 August 2015

Jerk Sweet Potato Chips


Things have been quiet here lately, as I've had so many things going on. I've been hanging on to this very special and very easy recipe for some time (since Jamaica month) so that I still had something absolutely delicious to share with you at a time when I have no time to cook or photograph food! These baked jerk sweet potato chips, inspired by Jamaica's ubiquitous jerk seasoning, were simply superb. I couldn't stop eating them and they were all gone very quickly!

They're great for when you're entertaining, because you can chop up your sweet potatoes and have them coated in your jerk seasoning and ready to go nice and early. Then just spread them out on a tray and stick in the oven for just 20 minutes or so before serving. If you're making for a group though, I advise making plenty because they were so very popular when I made them.

You can play around a bit with the quantities of the seasoning mix, according to your personal preferences. Make all the teaspoon and tablespoons nice and generous though :)

Jerk Sweet Potato Chips

Ingredients
2 tsp allspice  
1/2 tsp cinnamon
1 tsp thyme leaves
1 tbsp brown sugar
1 tsp salt
1 clove garlic, very finely minced
1/2 scotch bonnet chilli, very finely minced (substitute 1/4 tsp cayenne pepper, if you like)
3 tbsp olive oil
2 large sweet potatoes

To Make
1. Preheat the oven to 200 degrees C.
2. Combine the allspice, cinnamon, thyme leaves, brown sugar, garlic and chilli and mix well. Add the olive oil and stir into a smooth paste. 
3. Peel the sweet potatoes and cut into chip shapes, keeping them all roughly the same size (otherwise they will all need different amounts of cooking time). Toss the sweet potatoes in the jerk seasoning, coating well. At this stage to can put them in the fridge, and cook later.
4. Spray a baking tray lightly with cooking spray and spread the chips out evenly. Try not to crowd them too much, you may need two trays. 
5. Bake for 20-25 minutes, until soft on the inside and a darkish caramelised brown on the surface (see picture). Serve hot. 

Check out my other Jamaican recipe posts:

Saturday 18 July 2015

Vegan Jamaican Patties


If, like me, you spend all winter dreaming of being in the Caribbean instead, you can do what I do and enhance your dreaming with delicious Caribbean delicacies.

Jamaican patties are quite different to what we call patties in Australia (and many other parts of the world). We use the word patty to refer to the meat or veggie fillings in burgers, but in Jamaica a patty is more like what we might call a pasty - a savoury pastry with filling. The pastry of a Jamaican patty is golden yellow from turmeric and curry powder, and the fillings can vary. They're most commonly filled with meats of various types, but can also be filled with vegetables or cheese. Tofu isn't a traditional filling, but the curried crumbled tofu and potato in these ones are so delicious, they were a huge hit (even with traditional tofu-phobes).

In Jamaica, it's common to eat a patty sandwiched in a bread roll as a full meal. I find that the pastry and bread together might be a bit of overkill, so just ate mine as they were. But if you'd like a traditional Jamaican lunch, grab yourself a bread roll (in Jamaica it would be coco bread).


Jamaican Curry Tofu Patties

Ingredients
Pastry:
3 cups plain flour
1 tbsp curry powder
1/2 tsp turmeric
1/2 tsp salt
1/2 tsp baking powder
100g vegan margarine/butter
3/4 cup ice water (give or take a bit)

Filling:
1 tbsp olive oil
1 onion, finely chopped
3 cloves garlic, minced
375g hard tofu, as much liquid pressed out as you can
2 tsp curry powder
1/2 scotch bonnet chilli (optional)
1 potato, peeled and diced into small cubes
1 tbsp chopped fresh oregano
2 tsp dried or fresh thyme
1/2 tsp allspice
1/2 cup chopped shallots

To Make:
1. To make the crust: combine the flour, curry powder, turmeric, salt and baking powder in a food processor. Chop the vegan margarine up and add it to the food processor, pulse it until the mixture resembles coarse breadcrumbs. Gradually add in the ice water while you're processing until the dough starts to clump together into a ball. Turn it out onto a bench and dust with flour. Wrap the ball of dough in plastic and refrigerate for 1 hour.
2. To make the filling - heat the oil in a large frypan (or wok) and add the onion. Sauté for about 5 minutes, until the onion is cooked. While it's cooking you can crumble up the tofu with your hands into a 'mince-like' consistency. Once the onion is cooked, add the garlic and cook for another 30 seconds or so. Add the crumbled tofu, curry powder, chilli, potato, and the herbs and spices along with  1 1/2 cups water. Reduce the heat to medium-low and simmer until all the liquid is gone and the potatoes are cooked through. Turn off the heat and allow the filling to cool and then stir though the chopped shallots. 
3. Preheat the oven to 180 degrees C. 
4. Get the dough out and divide it into 12 equal pieces. Roll out each piece to a circle about 1/8 inch thick. Each circle should be about 6 inches diameter. Place a generous amount of filling in the centre of each circle. Moisten the edges with a bit of water and fold them in half, crimping the edges together to seal them well. Continue with the remaining pastry and filling. Poke a couple of holes in the top of each one to allow the steam to escape while cooking. 
5. Line a baking tray with non stick paper and bake the patties for about 20-25 minutes, until golden. 

Makes 12 patties. 


Check out my other Jamaican recipe posts:

Monday 29 June 2015

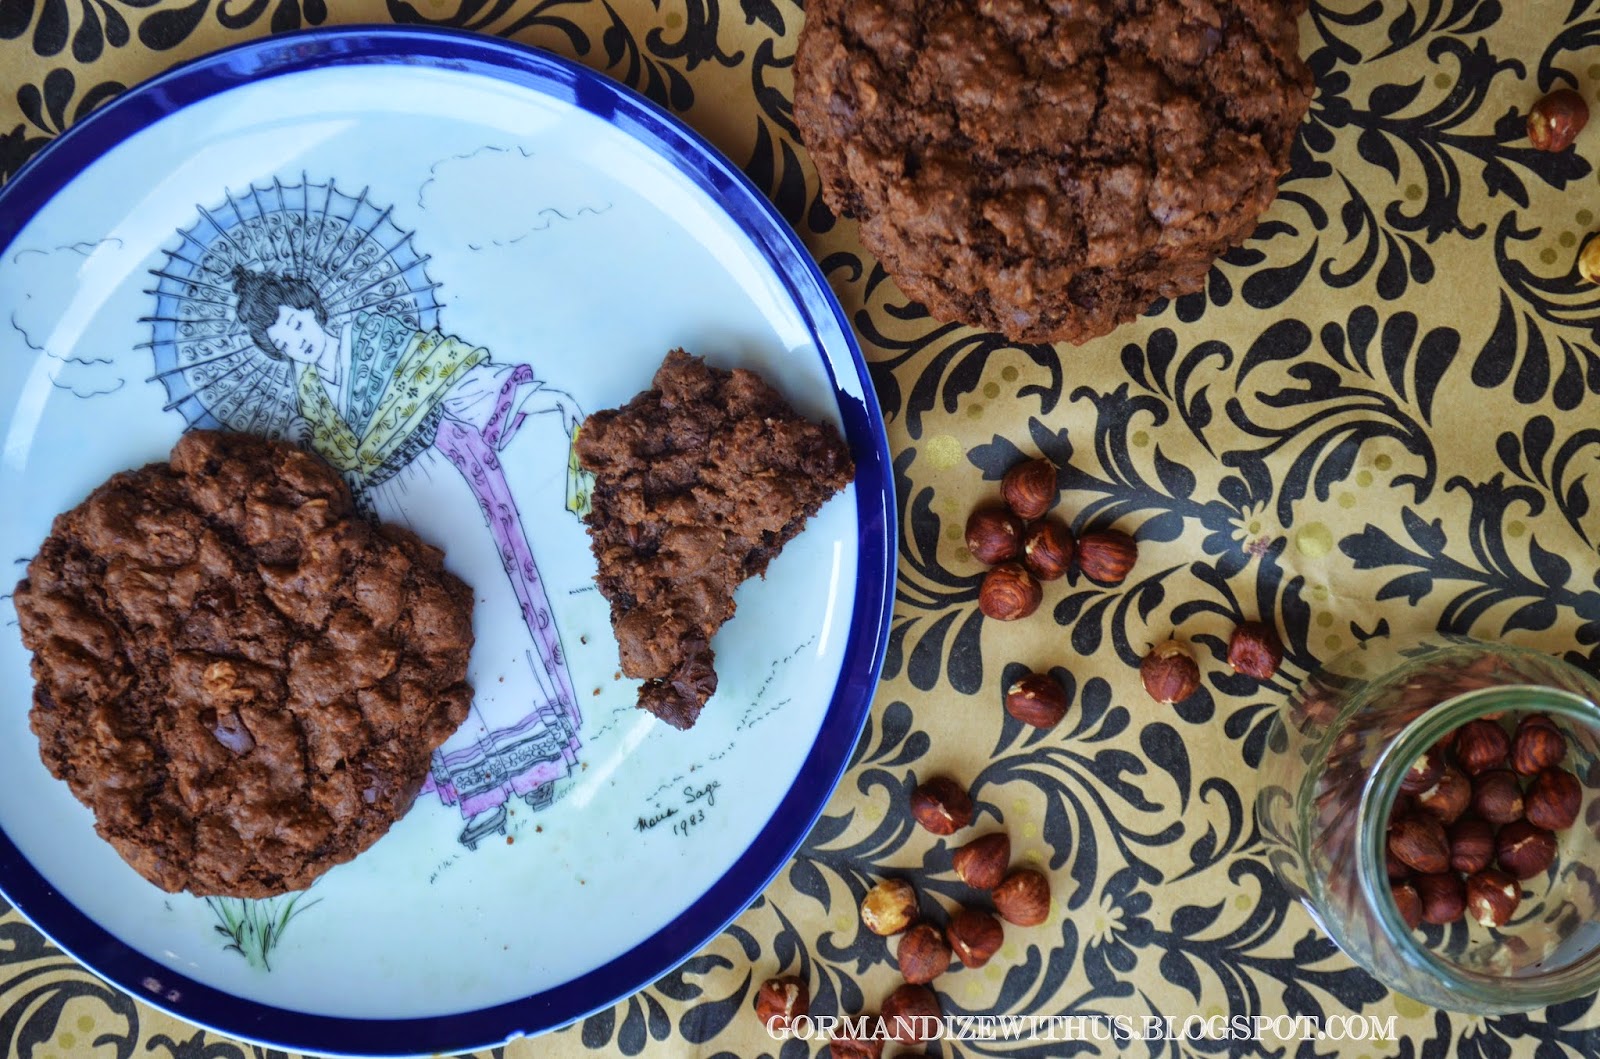
Chocolate Oat Hazelnut Chewy Biscuits (Vegan)


Oh, chocolate biscuits - how heavenly you are. I try my best not to cook biscuits, because there are only two of us here and of course that means we would eat them all. Very easily.

But sometimes you just need a big giant home made chocolate biscuit, the kind with everything in it and which is chewy and fudgy and rich and spectacular. These are those biscuits, they were incredible.


Chocolate Oat Hazelnut Chewy Biscuits

Ingredients
2 tbsp ground flaxseeds (linseeds)
2/3 cup oat milk (you can sub soy or almond or hazelnut milk)
2/3 cup apple sauce
1 tbsp canola oil
1 tsp vanilla extract
1 2/3 cups wholemeal flour
2/3 cup cocoa powder
2 cups rolled oats
1/2 tsp baking powder
1/2 tsp bicarb soda
1 1/4 cups sugar
2/3 cup roughly chopped hazelnuts
3/4 cup roughly chopped dark chocolate chunks

To Make:
1. Preheat the oven to 180 degrees C.
2. Whisk together the ground flaxsees and oat milk and then add the oil and the vanilla extract.
3. Add in all the dry ingredients, leaving the hazelnut and chocolate chunks til last and then folding them through.
4. Line a baking tray with non-stick baking paper. Drop about 3 generous tablespoons of batter onto the paper for each biscuit, leaving plenty of space between them (at least 2 inches) for them to expand as they cook. I could only fit six onto my rectangular tray. 
5. Bake for 12 minutes (they should have spread out and be cooked on the outside, but still a bit soft in the middle when you gently press on them), then remove from the oven and let them cool on the tray for 5 minutes before transferring to a cooling rack. 
6. Continue until you have used up all the batter.

This makes about 8-10 really big biscuits, but you can make them smaller if you like, just reduce the cooking time by a couple of minutes. 


Tuesday 16 June 2015

Spinach, Mushroom & Sesame Udon Noodle Soup


We just came back from travelling in Singapore, which we absolutely loved. We had such a good time and I think it's probably the coolest Asian city I've ever visited, with a great vibe to the whole place. We will definitely be going back there. While we were there we did a bit of street market shopping. Singapore is by no means a cheap place to visit and travel, but I picked up a few knick-knacks to remind me of our time there. One of them were these cute pairs of chopsticks. My partner and I are both year of the Rabbit, so we picked up two pairs of rabbits and I got a pair of dragons for my best friend. In hindsight I should have got a pair for everyone - but maybe next time I'm in Singapore!


This beautiful soup is quick, easy and so very tasty and is a favourite go to quick lunch or dinner for me. Spinach is not a common addition to an Asian noodle soup, but the flavour and colour are so well suited. Don't scrimp on the sesame seeds, they are more than just a garnish!


Spinach, Mushroom & Sesame Udon Noodle Soup

Ingredients:
6 dried shitake mushrooms
2L vegetable stock
5 tbsp soy sauce
250g button mushrooms
150g oyster mushrooms
1 small tin of bamboo shoots
4-5 leaves of spinach (silverbeet)
2 small bunches of bok choy
2 tbsp mirin
4 x 200g packets of fresh udon noodles (or a large 800g pack)
4 tbsp white sesame seeds
Sesame Oil

To Make
 1. Put the dried mushrooms, soy sauce and the vegetable stock in your wok and set it to simmer while you do all the rest of your prep.
2. Prep the ingredients: slice the button mushrooms, slice the oyster mushrooms into strips, drain the bamboo shoots, chop the spinach into thin strips and chop the bok choy finely horizontally.
3. Once you’ve done all that (will take about 10 mins depending on how fast you chop) remove the whole shitake mushrooms from the stock and slice them.
4. With the stock simmering add the ingredients in the following order: shitake mushrooms, button mushrooms, bamboo shoots, oyster mushrooms, spinach.
5. Simmer for about 2 minutes once all the ingredients are in and then turn off the heat and add the bok choy and mirin.
6. Rinse the udon noodles gently under some hot water and put about 200g in the bottom of each bowl. Ladle the hot soup on top of the noodles in each bowl.
7. Heat a non stick frypan over a medium heat and dry toast the sesame seeds until just golden brown.
8. Drizzle some sesame oil over each bowl and top generously with toasted sesame seeds.

Serves 4 .


Thursday 4 June 2015

Corn & Tofu Soup


About a week and a half ago we flew home from holidaying in The Maldives, which looked like this:


Back home now and it's officially "unseasonably cold". Sad face. There is only one upside - for the last week or so we have been having soup for dinner most nights. It's perfect on four fronts - warming, easy, cheap and healthy! We overindulged a lot while travelling (of course) and although I have absolutely no regrets, it doesn't hurt to have a healthy couple of weeks now that we're back.


I made this delicious Corn & Tofu Soup when we had people over for dinner the other night and it was incredibly popular, including some people saying they 'don't usually like soup' (causing me to question why I'm friends with such people) but loved this one. A few asked for the recipe, so I've made sure I blogged it nice and quick.

It only takes about 15 minutes to make, which it another point in it's favour. You could also opt to puree it at the end, if you like creamy soups, but then you'll loose the nice texture of the pieces of tofu.

Corn & Tofu Soup

Ingredients
1 onion, diced
1 tbsp margarine
2 cloves garlic, crushed
2-3cm fresh ginger, peeled and grated
1 tomato, finely diced
200g hard tofu, cut into small cubes
500g corn kernels (use fresh, frozen or canned)
1 x 400g can of creamed corn
1 litre vegetable stock
Salt and pepper, to taste

To Make
1. Heat the margarine in a large soup pot and saute the onion until translucent. Add the garlic and grated fresh ginger and give it about another minute.
2. Add the tomato and the tofu and cook for a further 1-2 minutes. Then add the corn, creamed corn and vegetable stock and bring to a simmer. Simmer for about 10 minutes, and then season to taste with salt and pepper. Serve hot. 

Serves 4. If you're big soup lovers, make a double batch and eat it for lunch as well!


Tuesday 26 May 2015

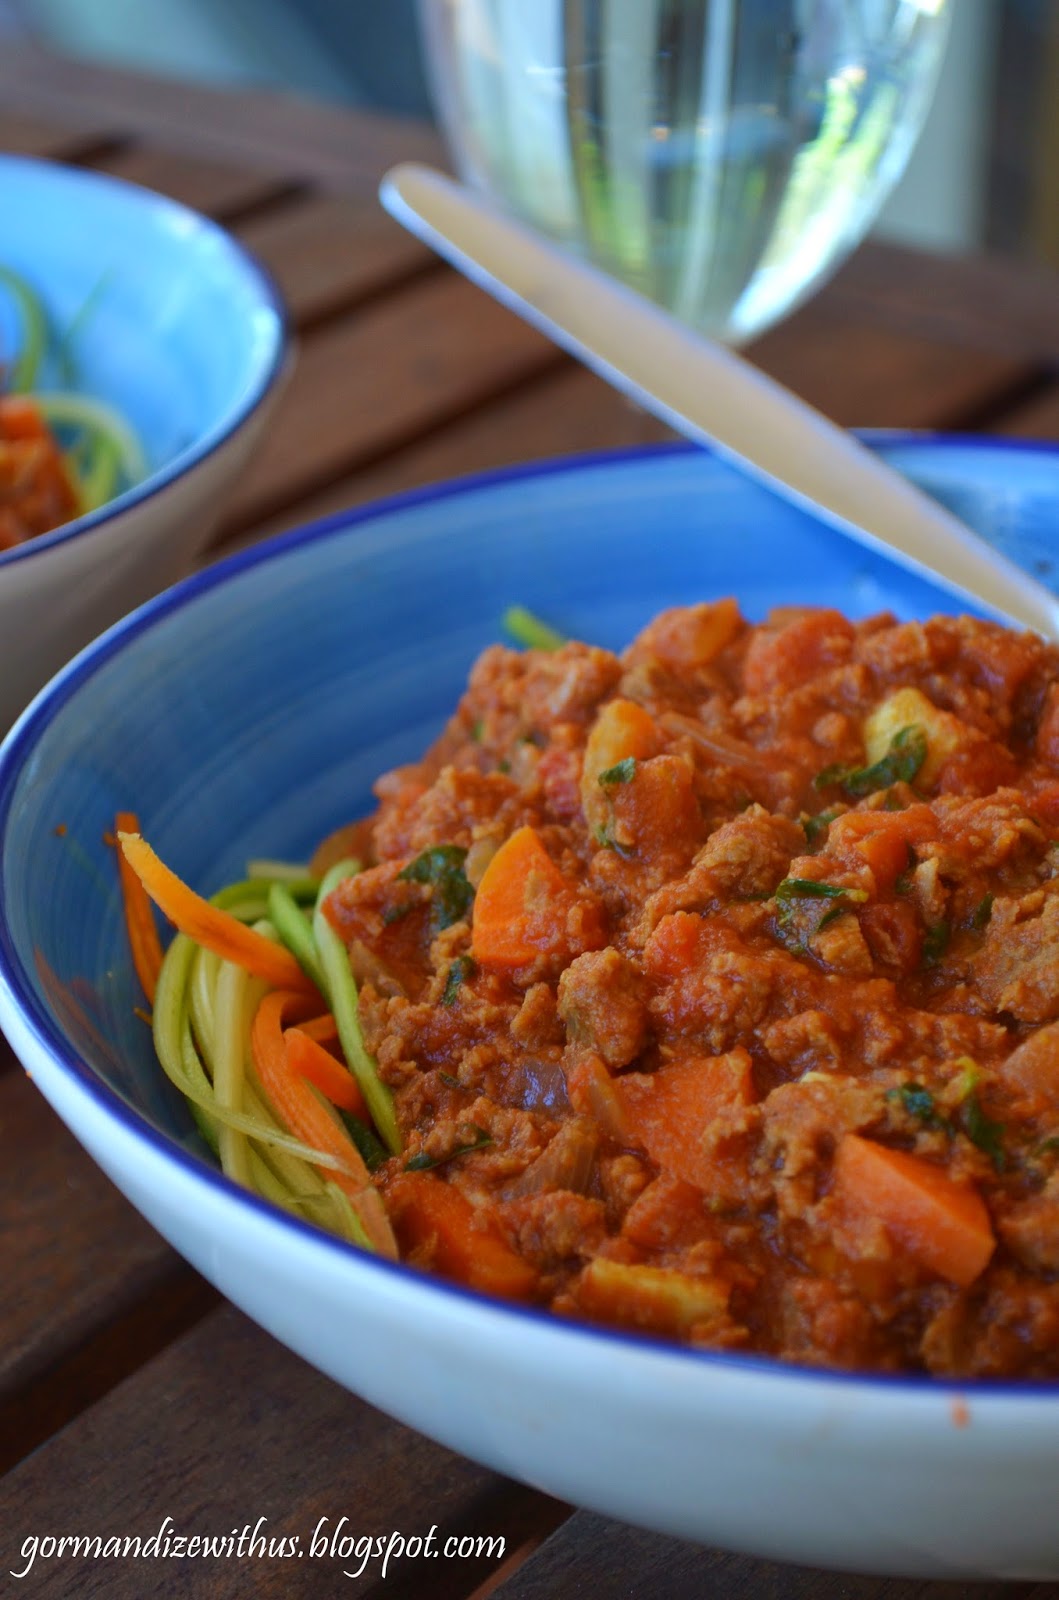
Vegan Nutmeat Bolognese with Zucchini and Carrot Spaghetti (low carb)


Like every other Australian kid, I grew up eating a lot of spaghetti bolognese. It's so commonly cooked in Australian homes that it's practically a national dish. Nobody in my family was vegetarian or vegan at the time, but my father used to switch around between making our bolognese with meat or with nutmeat. Even as a kid, I loved the nutmeat one more than the meaty one. When I grew up I learnt to cook it for myself and made it often. I introduced it to my Italian best friend and even he loved it more than the meat version. He wasn't a vegan then, but he is now and it's become the lunch we always cook whenever we catch up at, in either of our kitchens. So, it's a sentimental dish for me, and one I probably should have shard on the blog earlier.

Usually, I'd have it with thin spaghetti (the thinner the better!), but cutting back on my carb intake has meant experimenting with other options. These zucchini and carrot noodles taste wonderful with this sauce, and make for a much lighter meal. I've left mine raw, and then ladled the hot sauce over them which cooks them just slightly. You can also blanch them for a minute before eating to soften them up, but don't cook them much or they will break apart and become mushy. You'll want a julienne slicer to get them nice and noodle-y, but I seem to recall mine cost less than $2 from eBay.


Vegan Nutmeat Bolognese with Zucchini & Carrot Spaghetti


Ingredients1 tbsp. Olive oil
1 onion, diced
2-3 cloves garlic, minced
1 carrot, finely diced
1 x 400g can of nutmeat, chopped finely
2 x 400g cans diced tomatoes (or even better - 1 can diced, 1 can crushed)
1 tbsp. Tomato paste
1 tbsp. Soy sauce
Pinch of nutmeg
1/2 cup fresh oregano, chopped finely
Cracked pepper, to taste
1 zucchini, julienne sliced into noodles
1 carrot, julienne sliced into noodles

(or, use spaghetti)

To Make:
1. Heat olive oil in a pan and sauté the onion until just starting get translucent. Add the garlic and carrot and fry for a moment. Then add 1/3 cup water and simmer, covered, until the carrot is cooked through.
2. Add the chopped nutmeat, cans of tomatoes, tomato paste, soy sauce and nutmeg. Add 1/2 cup water and bring to a simmer. Simmer, uncovered,  for about 15-20 minutes by which point the sauce should have reduced and thickened nicely. Stir in the fresh oregano and add cracked pepper to taste.
3. Shred your zucchini and carrot into noodles using a julienne slicer and divide between two bowls. Ladle the hot sauce over them. If you like, sprinkle with some (vegan) parmesan cheese.

Makes enough sauce for 3-4 people, and enough noodles for 2.


Wednesday 20 May 2015

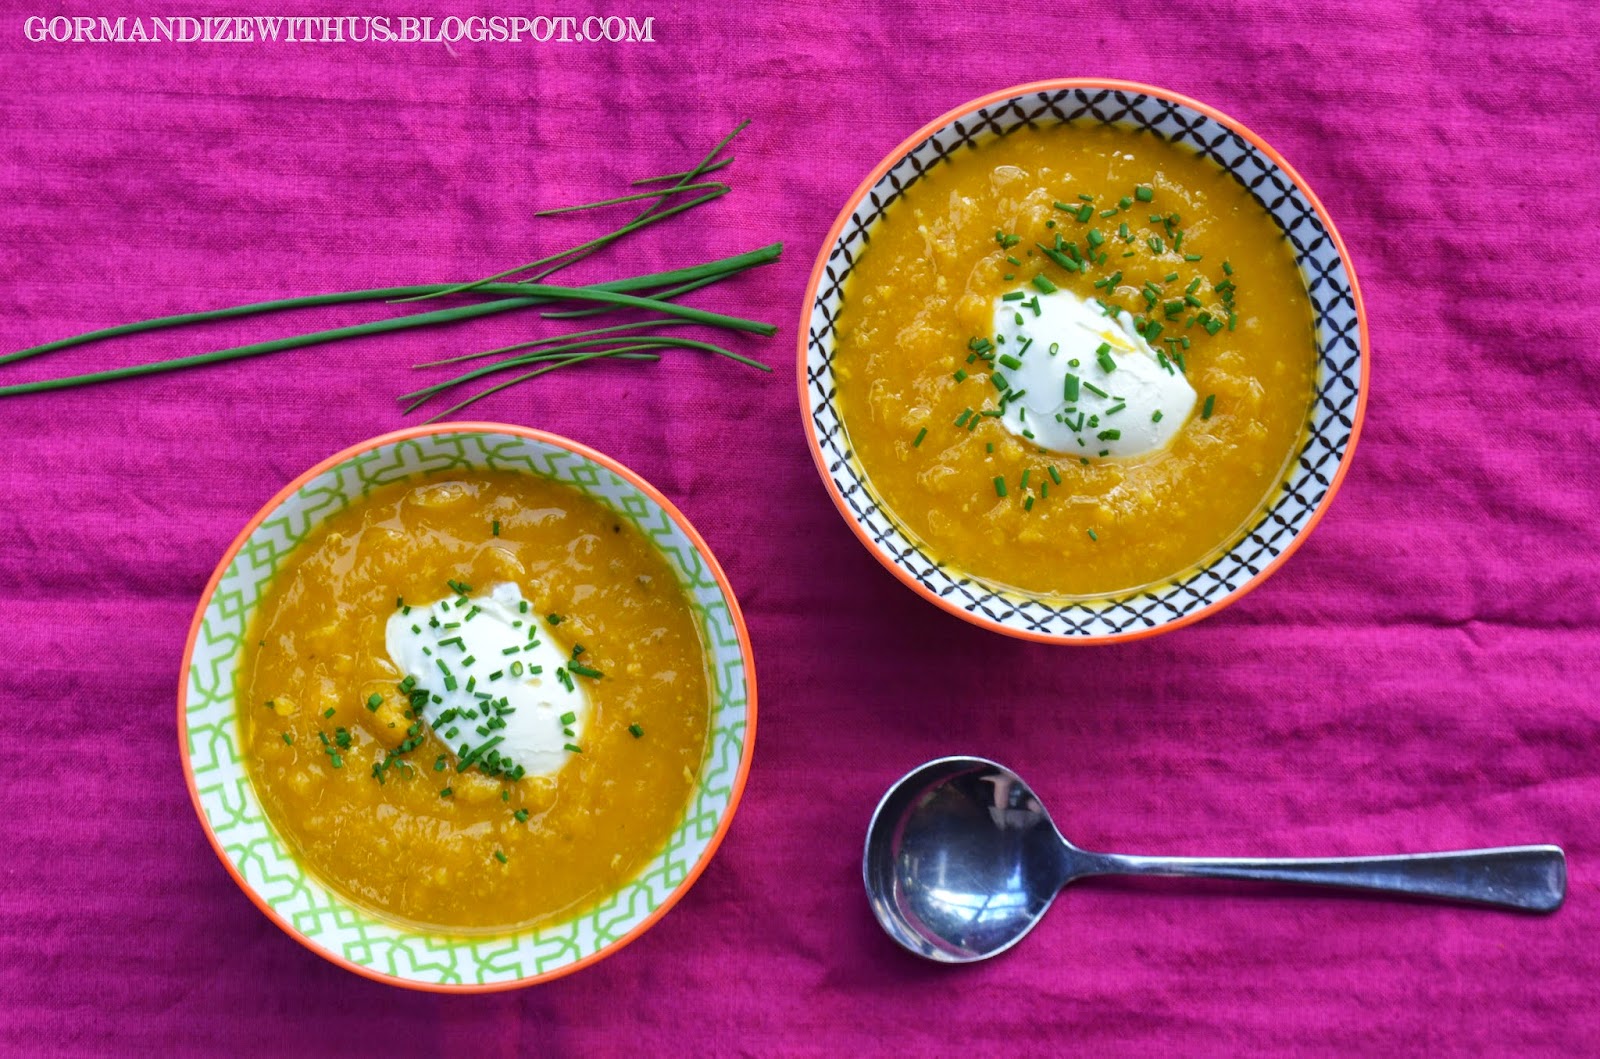
Pumpkin & Sweetcorn Soup


I'm not generally a big fan of cold weather, but when it starts to move in I try and look on the bright side. For me, there are only two pros to winter; one is climbing into a bed which has been pre-warmed by my electric blanket and the other is gorgeous soups and stews. Pumpkin is a classic which comes out every autumn. I've eaten a lot of pumpkin soup in my life and it always surprises me how often it is incredibly average. It's one of those dishes that everybody makes, but not everybody makes well.

You can make this recipe as a straight pumpkin soup, without the corn. I have to thank my partner for the addition of the corn, I had never even thought of putting corn in my pumpkin soup before but he would often cook us pumpkin and sweetcorn soup for a winter dinner. In this recipe I've combined my favourite pumpkin soup with his version to make probably the best one I've ever eaten :)


Pumpkin & Sweetcorn Soup

Ingredients
1 kg pumpkin, skin removed an chopped
1 onion, chopped
1 large carrot, chopped
1 medium potato, peeled and chopped
1 large stick celery (including leaves), chopped
1 parsnip, peeled and chopped (optional)
1 bay leaf
2 heaped tsp powdered vegetable stock
3/4 tsp ground cumin
1/2 tsp ground ginger
2 x 400g cans creamed corn
Salt and pepper, to taste

To serve: vegan sour cream and chopped fresh chives.

To Make:
1. Boil the kettle while you chop all your veggies up.
2. Combine the pumpkin, onion, carrot, potato, celery, parsnip, bay leaf and powdered vegetable stock in a big soup pot. Add enough hot water so that it is just below covering all the vegetables and bring to a simmer.
3. Simmer, covered for about 20 minutes. Stir every now and then to ensure that the veggies on top get cooked too, as they cook down they will release their own liquids and there will be enough water in the pan to cover all the veg but if you put in too much water at the start then you'll end up with watery soup.
4. Remove the lid and add in the ground cumin and ginger. Simmer, uncovered for another five minutes. Remove from the heat and all to cool until it is cool enough to blend.
5. Blend until smooth (a few chunks are ok too) and then return to the heat. Add the 2 cans of creamed corn and stir though, leaving it on the heat until heated through. Season generously with salt and pepper.
6. Serve hot with a dollop of vegan sour cream, chopped fresh chives and warmed crusty bread.

Serves 4 (with bread).


Sunday 17 May 2015

Burmese Eggplant Salad (Khayan Dhi Pope Thoke)


This recipe was one of my favourites from Myanmar month, but I didn't get time to share it that month so here it is, a little late. I made this dish a couple of hours in advance before a dinner party and left it sitting on the bench so that it would be room temperature (rather than chilled in from the fridge) when I served it. Evertime I walked past where it was sitting on the bench I got this divine waft of sesame oil and roasted eggplant and it just smelled so amazing. I couldn't wait to eat it! The smell and taste of this salad are both just wonderful, plus it's very quick and easy to make.


Burmese Eggplant Salad (Khayan Dhi Pope Thoke)

Ingredients
2 large eggplants
1 tbsp toasted sesame oil
1 tbsp vegan fish sauce
1 tbsp light soy sauce
1 green chilli, de-seeded and chopped
1 clove garlic, crushed
Juice of 1 lime
1 large (or 2 small) shallot, white and green parts chopped
Fried shallots, to garnish (optional)

To Make
1. Heat oven to 180 degrees. Pierce eggplant skin a few times with a fork. Lightly oil a baking tray or dish and bake eggplants on it for 20-30 minutes, turning the eggplant over once about halfway through. The eggplant should be soft and the skin easy to peel off. 
2. Cool the eggplants and then peel the skin off. Chop the roasted flesh roughly and put in a bowl (try to catch all the juices as well). 
3. Add the sesame oil, vegan fish sauce, soy sauce, green chilli, crushed garlic and lime juice to the eggplant and mix well. Season with pepper. Taste to check seasoning, and add a little extra of whatever you think it needs more of. 
4. Stir through the chopped shallots. If you like, sprinkle with some fried shallots (pictured in the second photo, but not in the first) immediately before serving.

Can serve either warm with rice (serves 4), or room temperature as a side salad (serves 6).


Last December I featured vegan recipes from Myanmar (Burma).
Check out my other Burmese recipe posts:

Monday 11 May 2015

Callaloo (with Kale)


Callaloo is a dish made all over the Caribbean and some parts on Africa. It's made with a leafy green vegetable - generally taro leaves, amaranth or calalu. Often the vegetable itself is known as callaloo. Sadly, I don't have those options available so I've made mine using kale. It's perhaps not so authentic, but it turned out delicious. The kale keeps its texture so beautifully.

In Trinidad and Tobago callaloo includes okra, in some parts of the Caribbean it may include coconut milk, seafood or meats. This is a Jamaican version, made as part of my Jamaican food month a couple of months ago, so it's flavoured with onion, garlic, tomato and scotch bonnet chilli.

It may look like not much, but sometimes simple is just so special and this callaloo makes a great side veggie dish. Leftovers also make a sensational pizza topping.


Jamaican Callaloo

Ingredients
1 big bunch kale
1 tbsp. oil
1/2 cup water
1 tsp. vegetable stock powder
1 onion, diced
1 tomato, diced
1/2 scotch bonnet chilli
2 cloves garlic, crushed
1 tsp. thyme leaves
Pinch of salt

To Make 1. Wash the kale thoroughly and remove the tough stems. Chop or tear roughly into medium sized pieces.
2. Place the chopped washed kale in a large pot and top with all the other ingredients. Cover with a lid and place over a medium heat. Cook for 10-15 minutes. Serve with rice.


Check out my other Jamaican recipe posts: